In March 2012 I noticed Lisa’s frustration with the damage done in workouts to the center bushings in the rubber bumper plates. I thought I could fix the problem so I made some aluminum plates to sandwich the bushing from each side, essentially becoming a new bushing to slide on the bar.
She posted pictures on the Crossfit Flagstaff website on March 17, 2012:
http://www.crossfitflagstaff.com/equipment/2012/03/new-life-for-lighter-bumper-plates.html
These repairs were easy to install because the plate simply attached to the rubber with screws. The problem was that the screws would back themselves out due to impact in the workouts and the repairs would lose effectiveness. Even gluing the screws in place didn’t keep them from backing out. We struggled with having to frequently re-tighten screws for over a year.
I even sent out some prototype repair kits to other gyms. The kits failed miserably and I’m a little embarrassed about it.
I had to figure out a way for the repair plates to stay positioned permanently, so I tried gluing a plate to the rubber with 3M high bond adhesive. The adhesive method turned out to be inferior to the screw fastened method. The plates would migrate out of position rendering them useless.
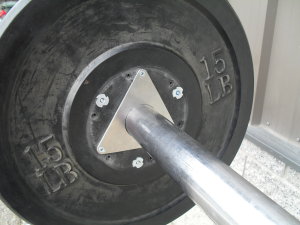
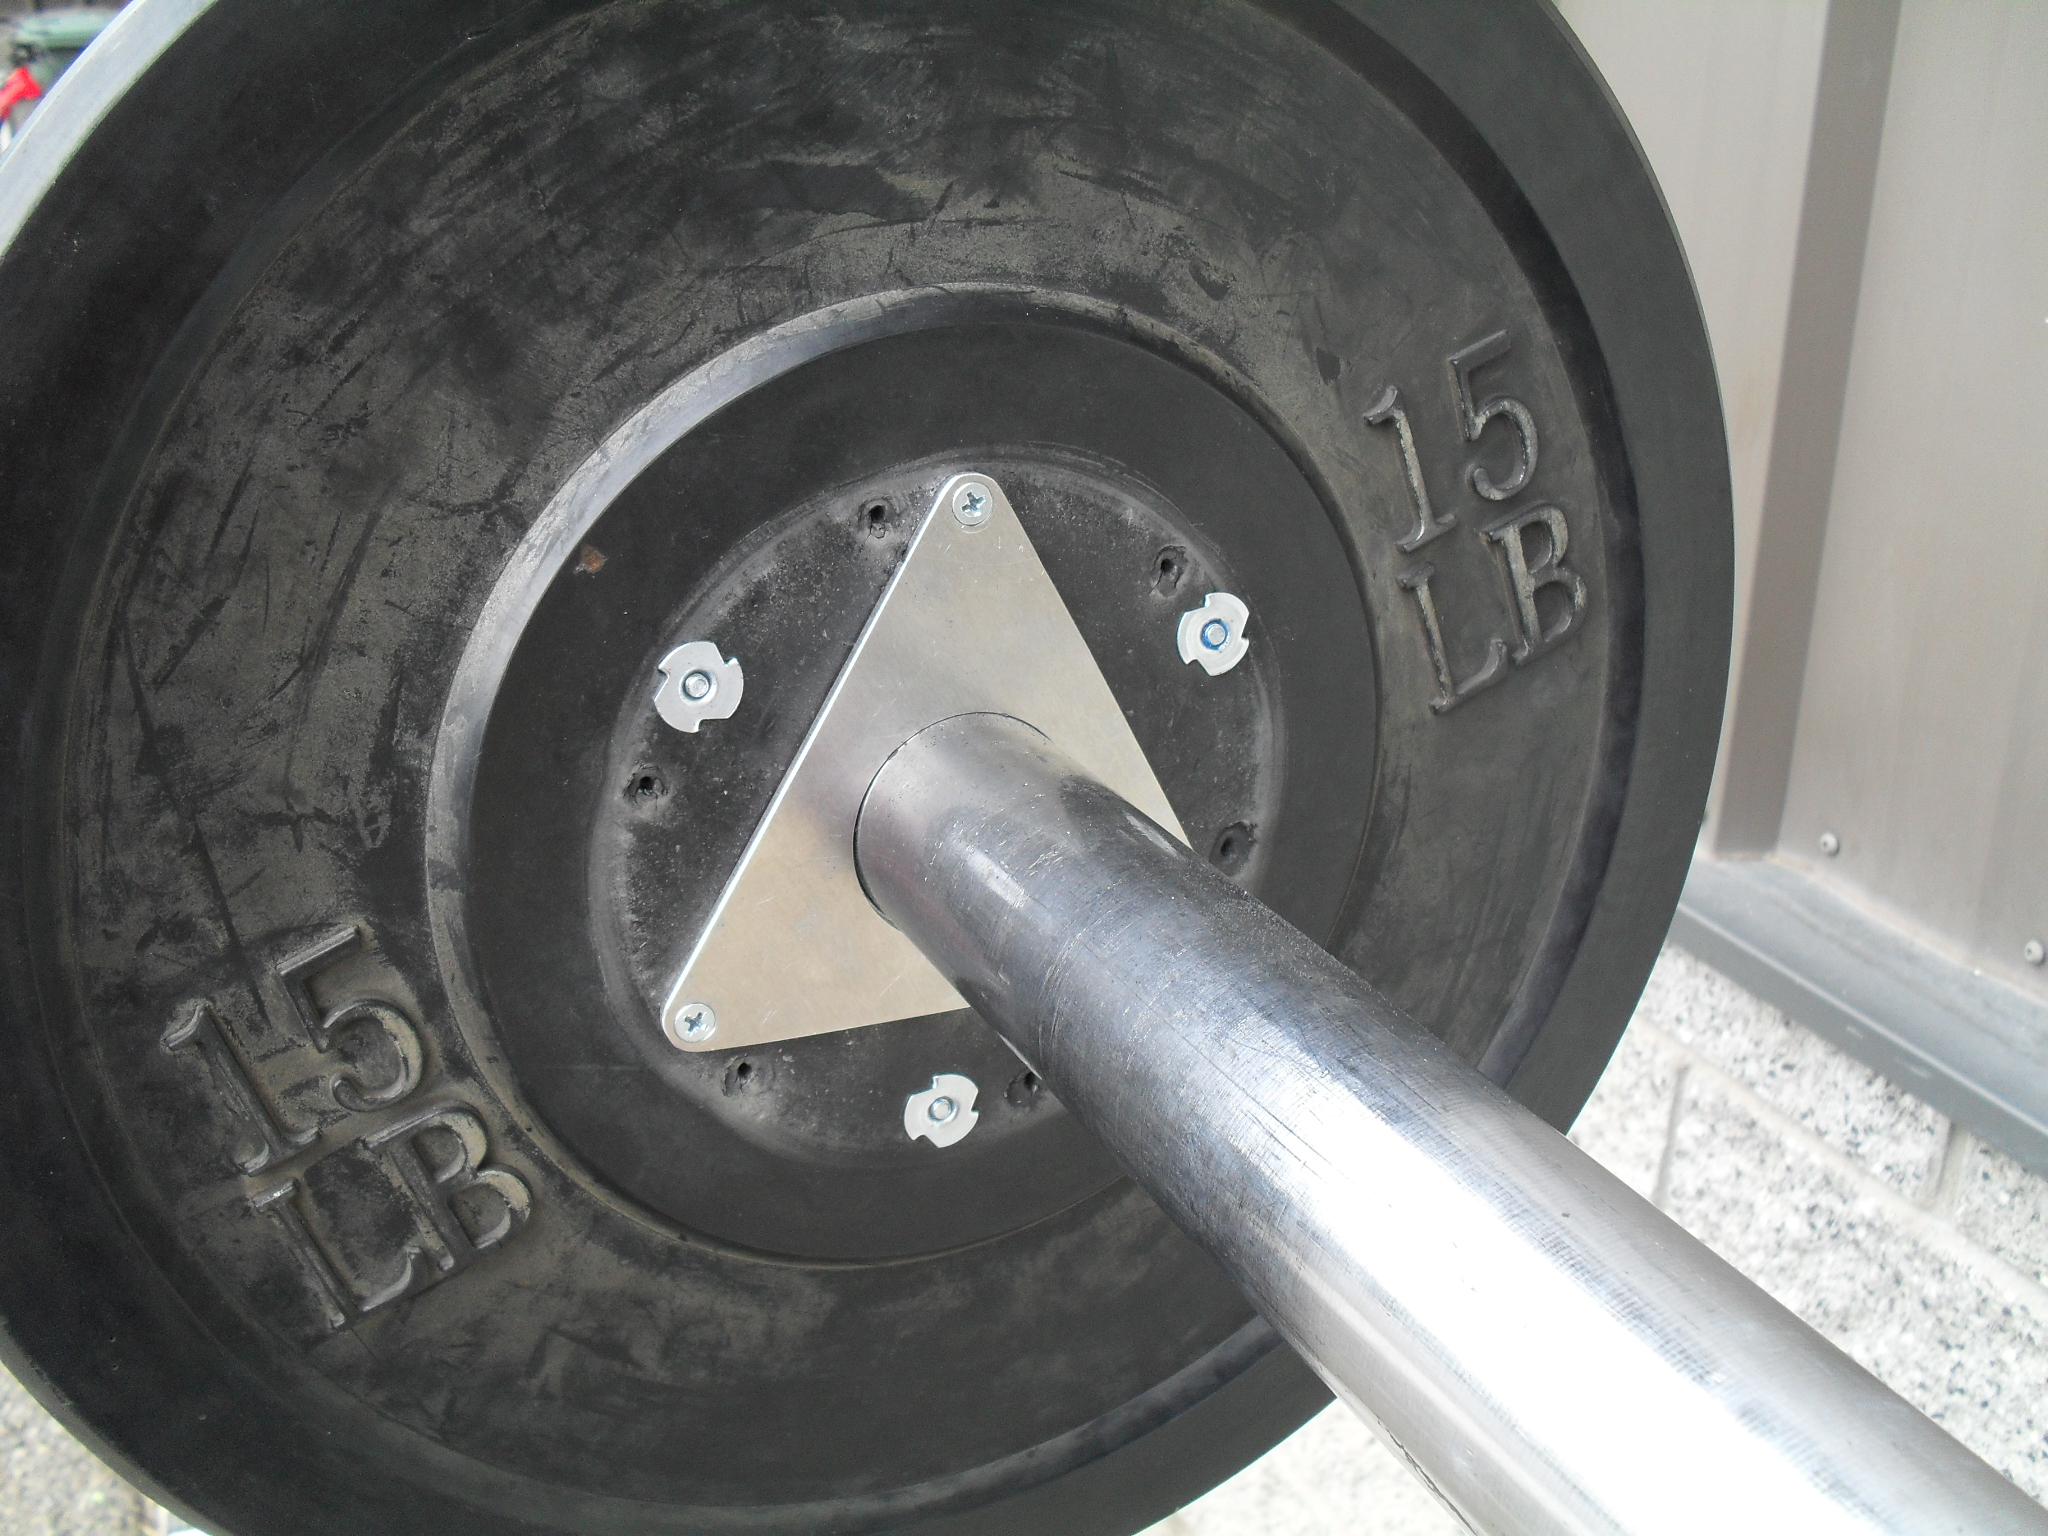
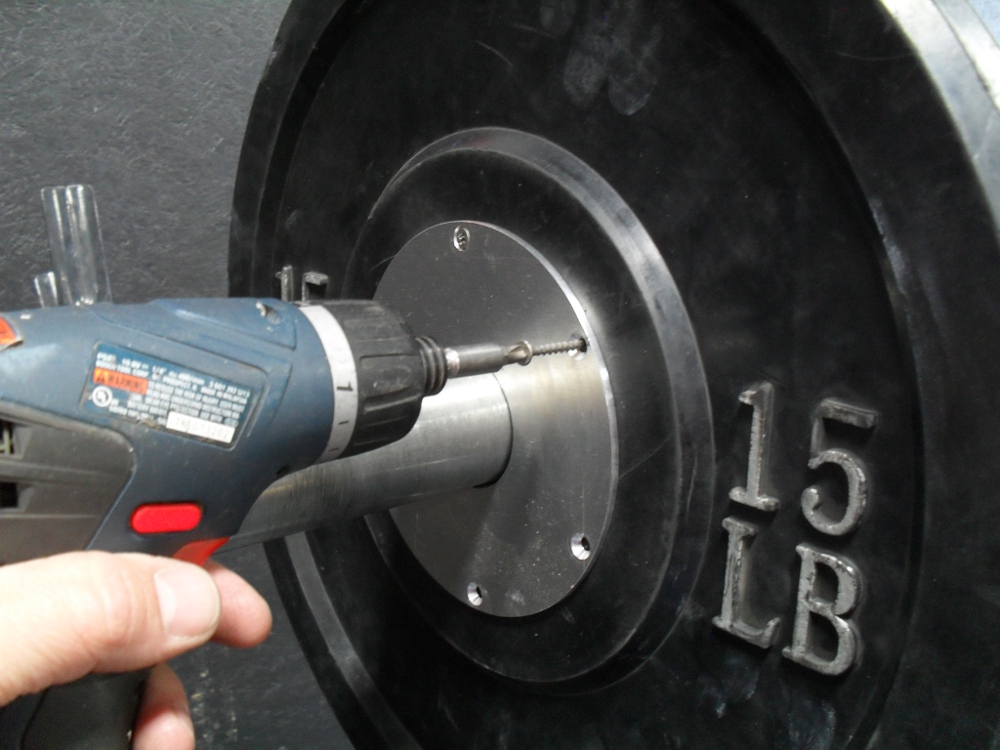
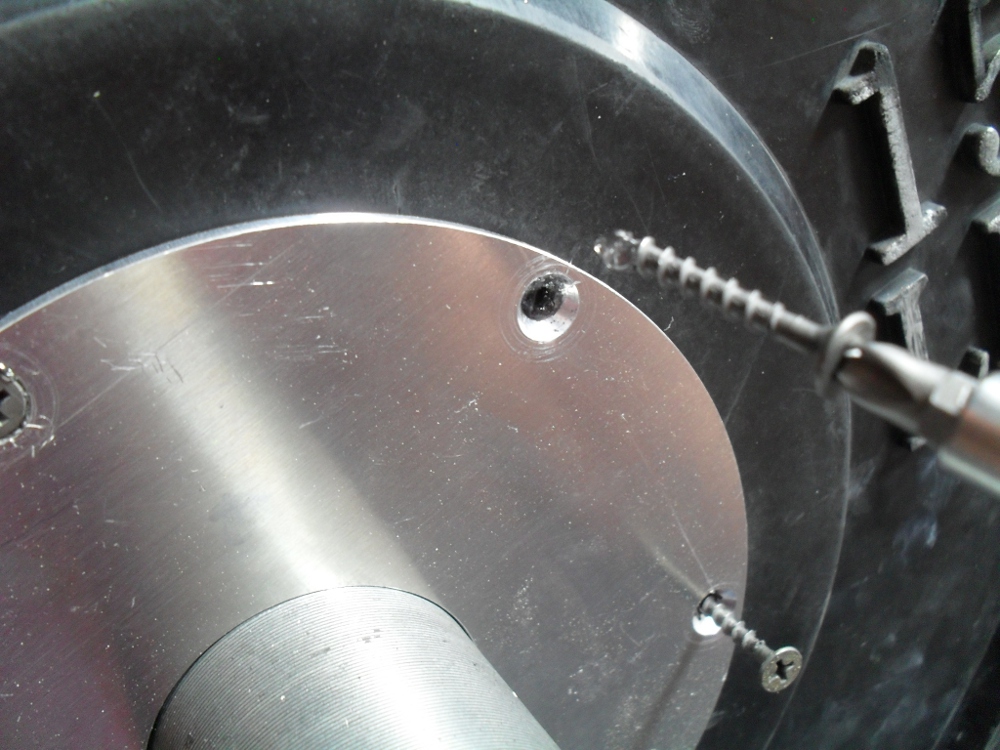
Then in June of 2013 I had the idea to use T-nuts and machine screws to cinch in the repair plate. I drilled holes right through the rubber part of the bumper plate to accommodate the machine screws and the T-nuts held themselves in place grabbing on to the rubber on the other side. It worked well to hold one plate on but it would interfere with installation of the opposite plate. To solve this problem, I cut off three of the holes so that the repair plate was triangular instead of circular. This way I could install the first plate as before and then install the opposite plate turning the kit roughly 60 degrees to clear the hardware of the first plate. The screws still wanted to loosen due to impact but this turned out to be an easy problem to solve using LocTite on the threads of the T-nut.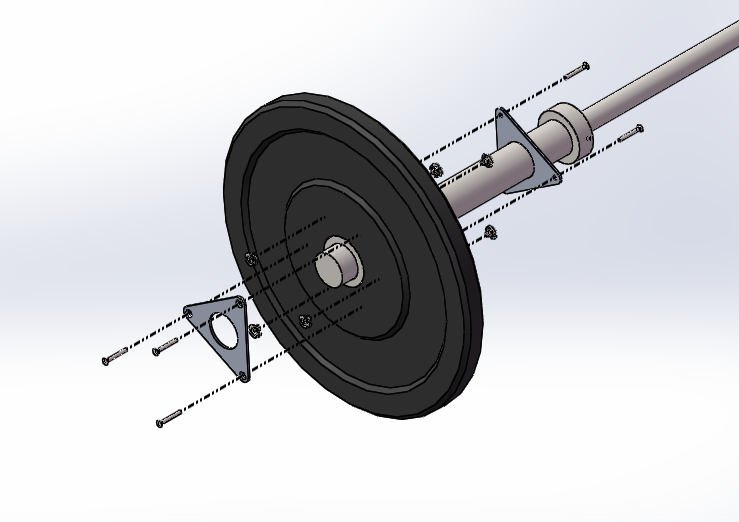
I documented installation instructions on BumperPlateRepair.com on July 10, 2013. Check out the Wayback Machine and you can see the original site design. Kind of ugly but effective nonetheless. Now the domain points to WodHardware.com
https://web.archive.org/web/*/bumperplaterepair.com
https://web.archive.org/web/*/wodhardware.com
I installed a run of prototypes at CrossFit Flagstaff. The kits have been successfully in service ever since.