Throughout this site we make recommendations for products that we like and that we think you will like also. At no additional cost to you, we may earn an affiliate commission if you buy these products through one of our links.
Has this ever happened to you? You’re at the gym minding your own business and because you don’t see it, you accidentally kick over a chalk bucket sending it tumbling.
The chalk goes all over the place leaving you surrounded in a cloud of dust.
How embarrassing! And how frustrating to have to clean up a big chalk mess after the workout.
Welcome to the Chalk Bomb Club.
 Here’s a brilliant way to prevent this from happening. (Shout out to CrossFit Flagstaff for the original idea.) Once you gather the tools and materials, it won’t take more than a few minutes to complete. You’ll have this problem solved for good.
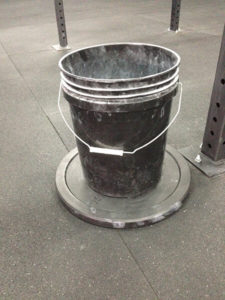
The illustrations below show how easy it is to convert a five gallon bucket (or any bucket, for that matter) into a kick proof chalk bucket by attaching it to an old bumper plate. The bumper plate becomes a nice wide base and adds ballast to keep the bucket from tipping over.
First, drill some small clearance holes for the screws in the bottom of the bucket. The holes should be just large enough to clear the threads of a drywall screw. There’s no need to pre-drill the bumper plate, the screws will go right into the rubber on their own.
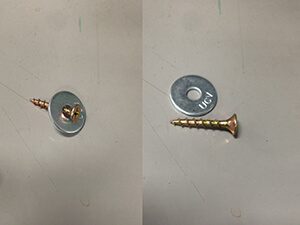
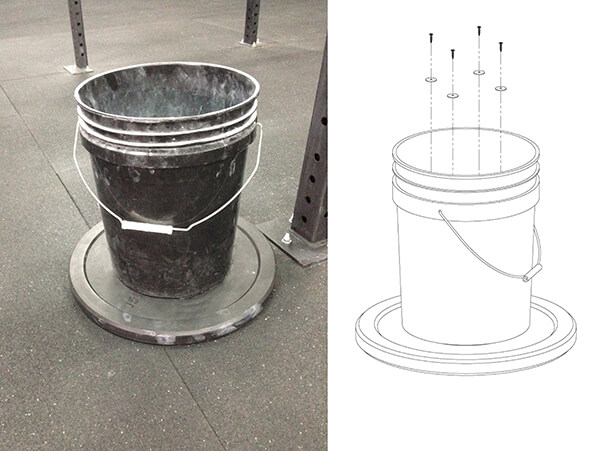 Then, attach the bucket to the bumper plate with short deck screws or drywall screws. The screws need to be long enough to grip but short enough not to protrude. A fender washer on each screw will keep them from pulling through the bucket.
Now that you know how to kick proof your chalk buckets you should never have to clean up another chalk bomb again. You can also feel good about re-purposing old, damaged bumper plates that would otherwise go in the garbage.
And since someone has finally developed an affordable bumper plate that won’t wear out, you can do something about those old plates with loose inserts falling out.
But we’re not quite finished yet. Let’s take this bucket improvement project a step further by adding a fabric cover which will help keep the normal day-to-day chalk dust down.
In this video, Smitty at Diesel Strength & Conditioning demonstrates how to do this using a t-shirt. He drapes the t-shirt over the bucket with the neck hole centered on top. Then, the t-shirt is secured in place with a light resistance band or some duct tape.
If the bulky t-shirt look is not fashion forward enough, then a JUNK brands chalk topper is the way to go. A chalk topper functions the same way as the t-shirt method allowing you to chalk up your hands inside the bucket without getting dust all over the place.
Fantastic! You have a great new addition to your gym. Now go fill it with chalk and make sure to look where you’re going next time.