Throughout this site we make recommendations for products that we like and that we think you will like also. At no additional cost to you, we may earn an affiliate commission if you buy these products through one of our links.
Bumper plates may be the most battered gym equipment.
They take the brunt of every barbell workout and cushion thousands of blows when they land on the floor.
Just because they are made of rubber doesn’t mean they are bombproof. In a heavy use gym environment the metal insert on some bumper plate designs becomes a point of failure.
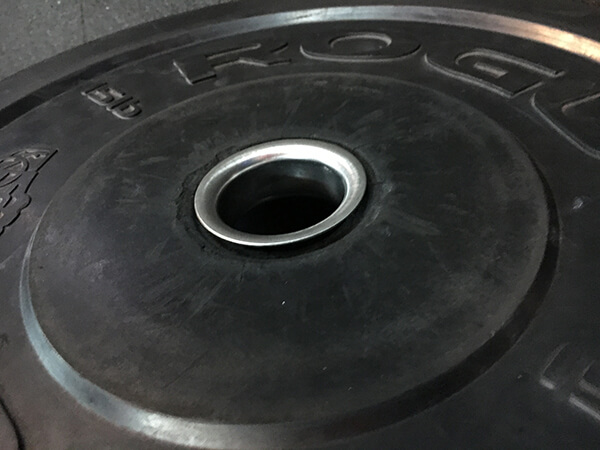
Unless you are using bumper plates designed with hooked or anchored inserts, you are likely experiencing the loose insert problem.
The loose insert problem
The shock of repetitive barbell dropping from overhead stresses the contact surface between the metal insert and the rubber body of the bumper plate. It doesn’t take long for the bond between these materials to weaken particularly with inserts that are not anchored.
Once compromised, this contact surface becomes a wear surface. Instead of supporting the bumper plate, the metal insert starts to scuff against the rubber. The material gradually wears away. As the number of impacts with the floor add up, the insert can get loose enough to fall out. Have you ever seen bumper plates with missing inserts? It’s not uncommon.
Of course, this sort of annoying failure always seems to happen after the warranty period ends. Otherwise you’d be talking to the supplier to get replacements instead of searching for a way to fix them.
Thankfully there is something you can do to solve this problem and there are also some ways to reduce future damage.
The gluing solution

As a temporary fix, inserts can be glued back into position with 5-minute epoxy.
Once cured, the epoxy occupies the void between the rubber and the metal securing the insert back in place. If your bumper plate inserts are loose, this simple gluing procedure will help you get some more life out of your equipment. Gluing bumper plate inserts can be done by any competent handy-person.
If you don’t want to mess around with repairs and you’re ready to replace your damaged bumper plates with new ones, make sure to choose bumpers with hooked inserts firmly anchored into the rubber.
For the frugal do-it-yourself type, the gluing method will buy some more gym time. Here’s how to do it.
Step 1. Get the right glue – instant mix epoxy
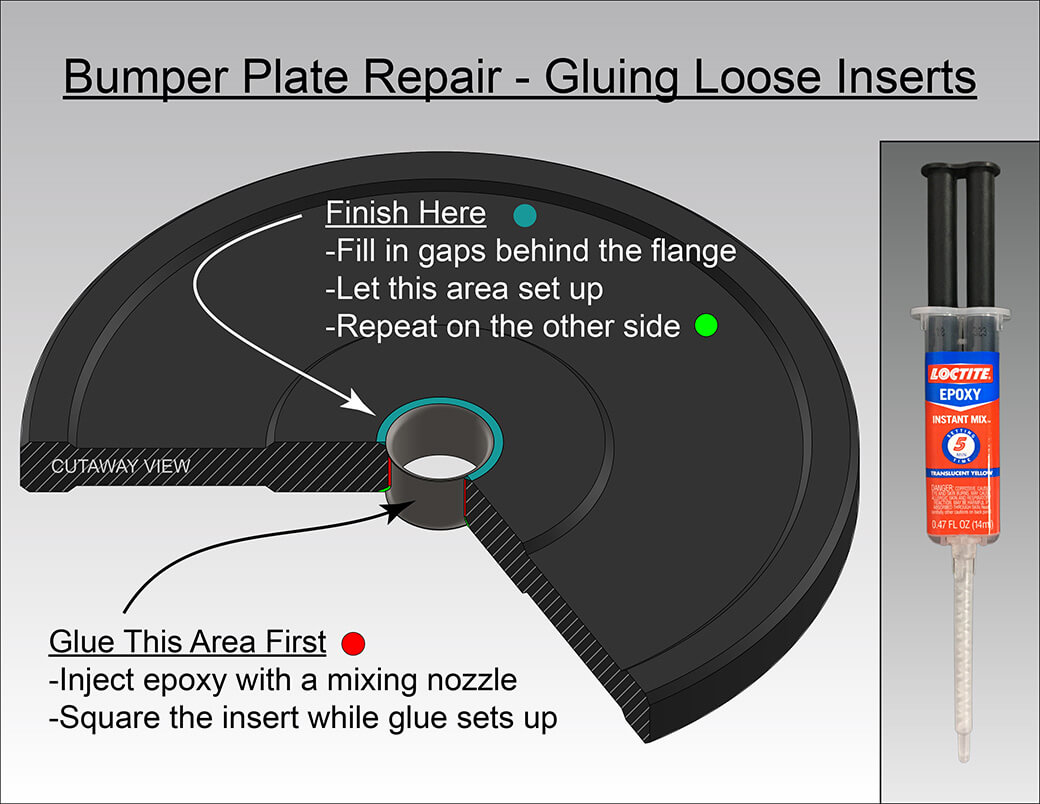
Two things need to be accomplished in order to achieve a satisfactory repair. First, plenty of epoxy has to go deep into the gap between the rubber and the insert. Second, the insert has to be held in position square to the body while the glue is curing.
Positioning the insert is a simple matter using the end of a barbell as an alignment guide. Epoxy on the other hand can be challenging to work with. Without the right tools it’s difficult to coax the thick, sticky substance into hard to reach places.
The trick to getting the glue where you want it to go is to inject it into the repair using a syringe with a mixing nozzle attachment. This technique would not be feasible without static mixing, an ingenious way to mix the two epoxy ingredients without handling them.
Epoxy products are readily available loaded into double syringes and equipped with static mixing nozzles.
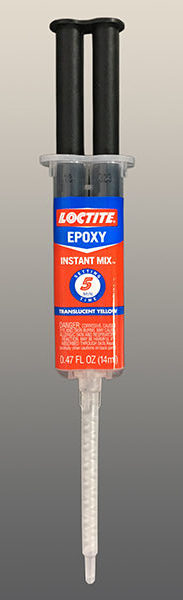
Loctite instant mix 5 minute epoxy is one such product.
This animation illustrates static mixing which is key to making this bumper plate repair solution quick and easy.
How much glue required depends on the thickness of the plate and how loose the insert is. It can vary significantly. As a starting point and a rough estimate, figure at least 1/8 fluid ounces per 1 inch plate thickness. With this formula, if you have two plates, each 1 1/2 inches thick, you would be able to fix them both with a 1/2 ounce syringe of glue.
The margin of error here is great. If you have a lot of plates to fix, be sure to underestimate what you need and plan on multiple repair sessions so you don’t end up buying too much glue.
Purchase instant mix epoxy on Amazon.
Step 2. Preparation for gluing
Because 5 minute epoxy begins to cure as soon as it moves through the mixing nozzle, you only have a few minutes to work.
It’s critical to get the first round of glue injected and the insert positioned before the glue sets up. Be ready with a way to hold the insert in position before you start gluing.
A good way to align the insert is to slide the repair onto a vertically oriented barbell after injecting the glue.
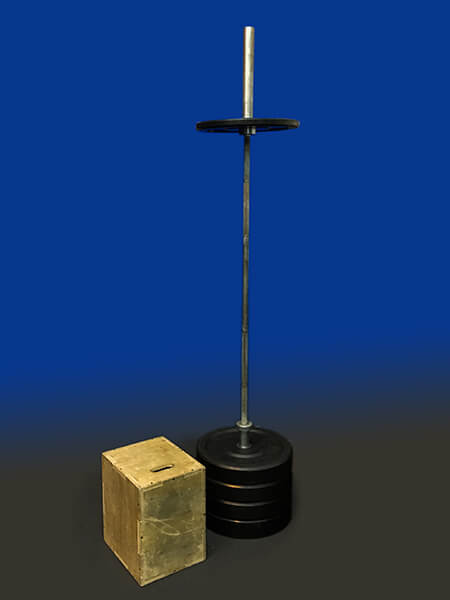
The barbell can be propped up vertically with a barbell holder or a stack of bumper plates.
Be sure to cover the barbell end with masking tape to protect it from epoxy drips.
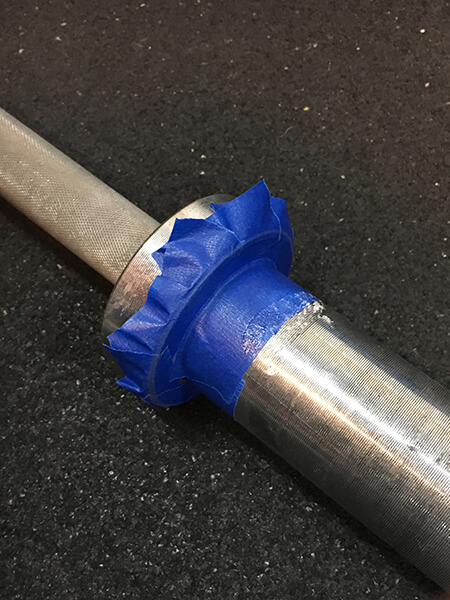
This barbell was not covered enough with masking tape. Some glue residue had to be cleaned off.
Alternatively, the bumper plate can rest on a flat block of wood or some object with a flat surface to effectively align the insert. The flat surface of this object should contact the entire rim of the insert and the flat central area of the bumper plate simultaneously. Protect the object from drips using a small sheet of plastic.
Step 3. Initial gluing
The first round of gluing is to get most of the void between the rubber and the insert filled and then to hold the bumper plate in position while the glue sets up. It’s not necessary to get it completely filled in one shot.
Break the cap off the end of the syringe and install the mixing nozzle. Push the nozzle into the gap and squeeze as much epoxy in without excess dripping out of the repair. Do this in several places around the insert to get thorough filling of the void. If possible, rotate the insert and wiggle it around to help distribute the glue.
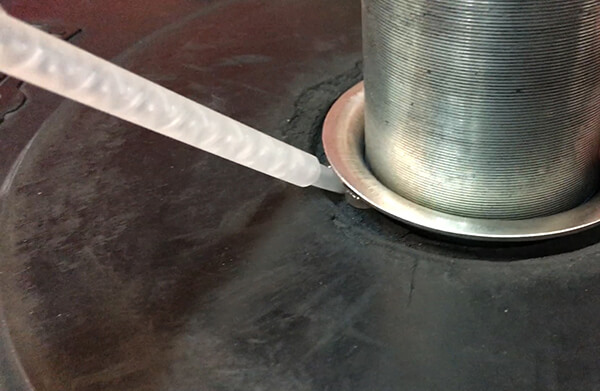
The mixing nozzle makes it easy to inject epoxy deep into the repair.
Once there’s enough glue as practical to inject, slide the bumper plate onto the vertical barbel end making sure the insert is pushed down flush with the rubber body. In just a few minutes the glue will set up and the bumper plate can be removed from the alignment guide.
What about plates with missing inserts?
There doesn’t seem to be good source for replacement inserts.
But you can make one out of a piece of 2 1/8 inch OD 18 gauge exhaust pipe.
With a hacksaw, cut a short length equal to the bumper plate thickness and glue it in the same way as above. There’s no need to bend flanges on the ends. The glue becomes the flange.
You can get a length of exhaust pipe at an auto parts store or order it from Amazon.
Step 4. Glue the flanges
It may not be possible to get complete coverage in the initial injection. If there is still space behind the insert flanges, fill those areas after the initial gluing has set up. Use gravity to your advantage. The epoxy will tend to self level if the bumper plate is horizontal. Let each side set up before gluing the opposite side. You may need to change out the mixing nozzle if the glue has set up inside and clogged it.
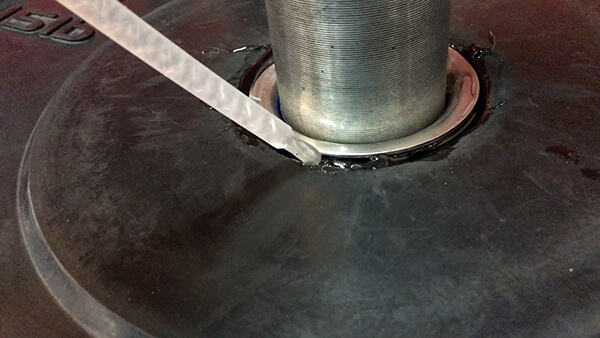
Fill the remaining gaps once the insert is firmly glued in place.
Step 5. Cleanup and curing
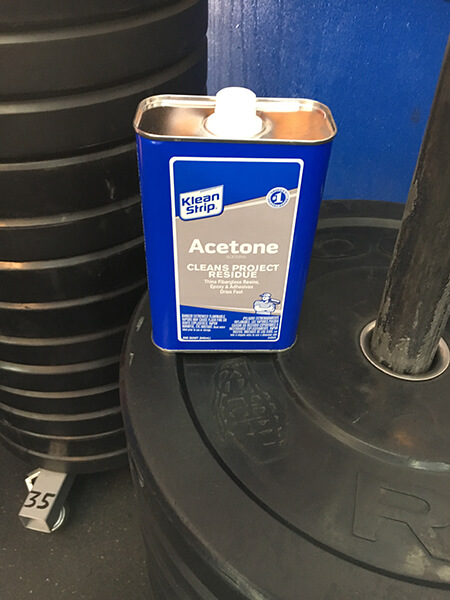
No matter how careful you are to avoid making a mess there’s a good chance you will get some glue where you don’t want it. Spills can be cleaned up with acetone which will dissolve epoxy resin even after it has started curing. Use acetone with caution as it is extremely flammable and hazardous to health. Follow the directions and safety guidelines on the can.
Although 5 minute epoxy sets up quickly it doesn’t reach its full strength for 24 hours. Let your bumper plate repairs completely cure before putting them back into service.
Taking good care of repaired bumper plates
Gluing loose bumper plate inserts is a cheap and easy way to get some more life out of your equipment. Keep in mind this is only a temporary fix. If glued inserts loosen up again, they can be re-glued using the same technique. But no repair will hold up long without adopting different gym policies that restrict excessive barbell dropping.
Most of the time there is no need to drop barbells from overhead. There are some exceptions, as when the weight is relatively heavy or when bailing out of a failed lift attempt.
It’s almost always easy enough to lower a moderately loaded bar to the floor in a controlled manner. From the overhead snatch position the bar can be guided back to the hang position and then lowered to the floor. From the overhead jerk postilion the bar can be guided to the front rack position then to the hang position and finally lowered to the floor.
Adopt a “No Ghost-riding” policy. Ghost-riding is the practice of careless and unnecessary barbell dropping.
Cut back on excessive dropping to preserve the integrity of repairs and also delay the failure of your other plates. And if you buy new bumper plates with hooked inserts, your new gym policy will ensure that they last an eternity.